
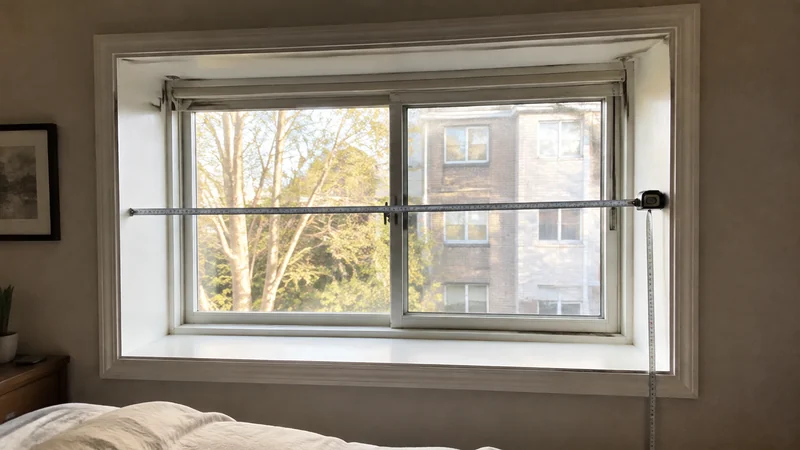
Keep the raw opening separate from the order size
The most expensive measuring mistake happens after the tape comes out: a raw window measurement gets turned into a product dimension before the mounting rules are known. Different no-drill systems use different headrails, clearances, factory deductions, and mounting depths. Record what the window actually is first. Convert those notes only after choosing the exact system.
That distinction matters because Blinds.com's cellular-shade guide asks for top, middle, and bottom widths and tells the buyer to retain the narrowest raw width, while the current SelectBlinds Click2Fit blackout system has its own top-width and factory-deduction instructions. One generic “subtract half an inch” rule can therefore create either a shade that will not fit or a light gap that did not need to be there.
Make this window map before shopping
Use a steel tape, pencil, and a simple sketch. Record measurements in width by height order and identify the exact surface where the headrail would sit.
| What to record | Where to measure | What it can reject |
|---|---|---|
| Usable recess depth | From the front of the opening to the first glass, handle, lock, screen, trim return, or other obstruction at the planned headrail height | A pressure-fit headrail that needs more depth than the window provides |
| Opening width | At the top, middle, and bottom, at the same depth where the shade would travel | A fixed-width or pressure-fit shade when the opening narrows or changes too much |
| Opening height | At the left, center, and right | A shade that cannot cover the full opening or clear the sill as intended |
| Two diagonals | Corner to opposite corner in both directions | A tracked or close-fitting system when the opening is too far out of square |
| Hardware envelope | The full path of cranks, locks, handles, tilt latches, screens, and the sash | A shade that fits on paper but blocks normal window operation |
| Attachment surface | Paint, wood, tile, metal, vinyl, PVC, or another frame material | Adhesive or pressure-fit hardware the manufacturer excludes |
| Removal route | How the shade, clips, tracks, and adhesive would come off | A renter setup that risks the surface or traps access to the window |
These are screening measurements, not a universal order form.
Step 1: choose the mounting plane
Open and close the window before measuring. Move every lock, latch, screen, handle, and crank through its normal path. The usable recess is the space left after those moving parts are protected—not the deepest point visible on the sill.
Mark the proposed headrail plane with removable tape. Measure depth at the left, center, and right because trim, glass stops, and frames can change along the opening. Blinds.com specifically treats recess depth as an eligibility check against the chosen product's minimum inside-mount requirement.
Step 2: record width changes instead of hiding them
Measure the opening width at the top, middle, and bottom at the planned travel plane. Keep all three numbers. a pressure-fit rail may be limited by its top measurement, while the fabric or side tracks still need to pass the narrower middle and bottom.
The SelectBlinds no-drill total-blackout page illustrates why the full set is useful. It asks the buyer to check three widths, applies its own deductions, and warns that a materially out-of-square opening is not recommended for that tracked system. The exact product instructions—not a blog-wide shortcut—must decide which number becomes the order width.
Step 3: check height, sill, and travel
Measure height at the left, center, and right. Then check the bottom rail at the sill and the fully raised stack near the headrail. The shade still needs to clear the lock, admit the intended ventilation, and leave the window operable.
A longer shade is not automatically safer. Excess material can stack at the sill, while a short shade can leave a bottom light path. Keep the three raw heights and use the selected manufacturer's ordering rule.
Step 4: compare the two diagonals
Measure from the upper-left to lower-right corner, then upper-right to lower-left. A difference tells you that the recess is not square. That may be manageable for a loose temporary sheet, but it can reject a system whose side tracks must stay parallel and meet a bottom rail.
The Click2Fit page currently requires at least 2 5/8 inches of inside-mount depth and says the system is not recommended when the two diagonals vary by more than half an inch. Those figures belong to that product, not every no-drill shade. Recheck the live specification for the exact configuration you intend to order.
Step 5: treat the frame material as part of the fit
No-drill does not mean no contact. A spring or lever headrail pushes against the side jambs. A peel-and-stick shade depends on a clean, compatible surface. A tracked system can combine pressure, clips, seals, and surface contact.
The SelectBlinds tracked system excludes PVC window frames. Redi Shade's current paper-blackout instructions use a trim, peel, and stick method instead. Those are different installation risks. Check the lease, paint condition, manufacturer surface list, and removal instructions before calling either one renter-friendly.
Run a paper mock-up before buying
Cut inexpensive paper to the proposed shade coverage and hold it in place without attaching it to the finished frame. Check the perimeter in daylight, then operate the window and every piece of hardware. The mock-up cannot predict fabric opacity or long-term attachment, but it can expose an undersized coverage plan, a blocked handle, or a travel conflict for almost no cost.
If narrow side lines of light would defeat the job, a basic inside-mounted shade may not be the right format. The light-gap diagnostic separates fabric transmission from perimeter leakage, while the research shortlist compares a temporary paper shade, reusable pressure-fit cellular shade, and a tracked benchmark.
Reject the setup before ordering when
- the usable depth is below the exact headrail requirement;
- the opening changes width beyond the product's stated range;
- the diagonals fail a tracked system's squareness rule;
- locks, cranks, screens, or the sash cannot complete their normal travel;
- the manufacturer excludes the frame material or finished surface;
- removal would violate the lease or risk a finish you are unwilling to repair;
- the expected edge gap is larger than the room can tolerate.
Bottom line
Measure the opening as a three-dimensional path, not one width-and-height box. Keep raw depth, three widths, three heights, both diagonals, hardware travel, surface, and removal notes. Only after an exact no-drill system passes those checks should its own instructions turn the map into an order size.