
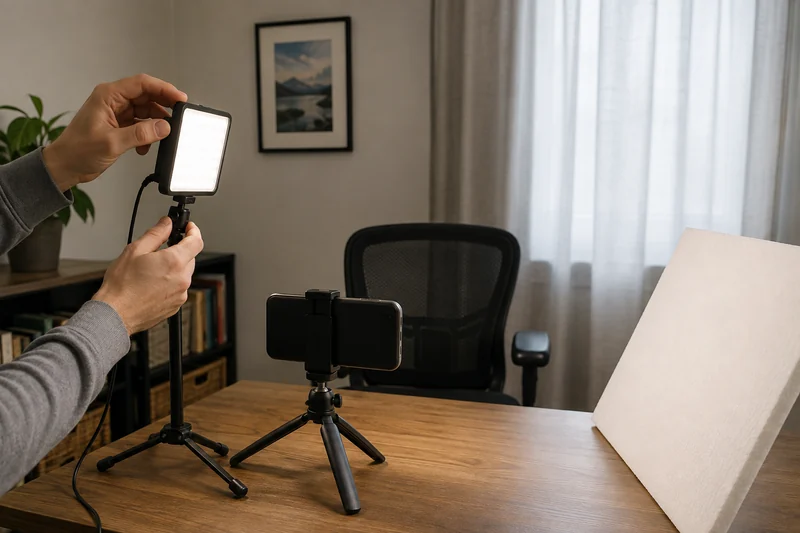
Treat the room as a geometry problem
Small rooms punish vague advice. A light can improve the face and still fail because its stand blocks the door, the phone throws a shadow, glasses reflect the source, or the subject cannot reach the record button.
Use four fixed points: phone, subject, useful light, and walking path. Begin with the phone at the final framing and the subject in the actual chair or standing mark. Then place one source. Do not build a three-light studio before one light works.
A practical starting position
Vimeo's current at-home lighting guide describes a window as a free key light and places lamps roughly 45 degrees to the sides and slightly above eye line for a simple nighttime setup. For one light, use that as a starting experiment rather than a universal measurement:
- Put the light in front of the subject, not behind.
- Raise its center a little above eye level and angle it gently downward.
- Move it about 30 to 45 degrees to one side of the phone.
- Keep the phone far enough from the source that neither blocks the other.
- Move the source closer before increasing brightness.
- Record ten seconds and adjust from playback, not from memory.
Face the source more directly for a flatter, more even look. Move it farther to the side for more shape, while watching that the far eye and cheek do not disappear. The right position depends on source size, diffusion, distance, glasses, skin, background, and the exact phone.
Match the adjustment to what you see
| Playback problem | First adjustment | Why it may help | Stop or change course when |
|---|---|---|---|
| Face remains too dark | Move the source closer, then raise output only as needed | More of the useful light reaches the subject without changing the whole room | Skin clips to flat white or the source becomes uncomfortable |
| Nose or cheek shadow looks hard | Move the source closer and broader, or reduce the side angle | A larger apparent source can soften the transition | An unsafe improvised diffuser would touch a hot or vented fixture |
| Glasses show a bright rectangle or ring | Raise the source, move it farther to the side, or change the subject angle slightly | Reflection angle changes while the camera remains fixed | The eyes become shaded or the new position blocks the room |
| Phone shadow appears on the face | Separate the phone and light axes or raise the source | The phone stops interrupting the beam | The light no longer covers the subject evenly |
| Background is brighter than the face | Reframe the bright area, shade it, or bring the key closer | The subject becomes the exposure priority | The window remains so bright that detail cannot be preserved |
| Dark side needs a small lift | Place white card outside frame on the darker side | Matte white can return some existing light without a powered fixture | The picture becomes flat or the card intrudes into the route |
Use the window when it is repeatable enough
A window can be the best no-buy source when the recording time, weather, and room orientation are predictable. Place the subject facing it or turn the window slightly to one side for shape. Adjust a safe sheer curtain or blind when direct sun is too harsh.
The catch is consistency. A setup that changes dramatically over a ten-minute take may be worse than a modest powered light for a repeatable series. Mark the time and position of a successful natural-light test. If the result cannot be repeated when content is actually recorded, the job is controlled illumination, not simply “more light.”
Keep the background subordinate
Adobe notes that a bright window can exceed the camera's ability to preserve both highlight and shadow detail. Avoid making the phone choose between a dark face and a perfect outdoor view. Reframe, close the shade partly, or move the subject so the brightest area is beside or in front rather than directly behind.
Do not push the subject against the wall just to escape the window. A little space behind the chair can reduce wall shadows and keep the background from looking like a flat cutout. In a small room, even one step can matter.
Build a safe footprint
Before settling on a light, trace the loaded footprint of the stand and cable. Open the door, roll the chair, reach the phone, and walk the normal route. A stable light that must be stepped over is not a stable filming system.
For a tabletop setup, verify that the phone and light bases do not overlap and that typing, product demonstrations, or overhead shots will not hit them. For a floor stand, place the legs fully open on a flat surface and keep the cord away from the door and chair casters. Follow the exact manufacturer's instructions for mounting, power, ventilation, and load.
Save a repeatable setup card
Record four measurements after the best test:
- phone-to-subject distance;
- light-to-subject distance;
- light height relative to eye line;
- light angle relative to the phone.
Also note window or curtain position, room lights that were off, brightness and color settings, phone orientation, and time of day. A strip of removable tape can mark stand and chair locations if the surface allows it.
Repeat the same ten-second line after moving the setup away and rebuilding it. The second assembly is the real repeatability test.
Know when one light is enough
One light is enough when the face reads clearly, reflections are controlled, the background is not competing, the setup survives small movement, and the room remains usable. A second powered source should solve an observed problem, not decorate the gear list.
If the setup fails because the light cannot get close, has no safe support, or cannot be repeated after dark, compare the three roles in the phone-video lighting research shortlist. Start with the smallest format that can do the defined job.
Bottom line
Place one soft source in front and slightly above the subject, begin about 30 to 45 degrees off the phone, and tune distance before brightness. Let playback, reflections, movement, and the room's real route decide whether the position is good. The goal is a repeatable shot—not a miniature studio.