
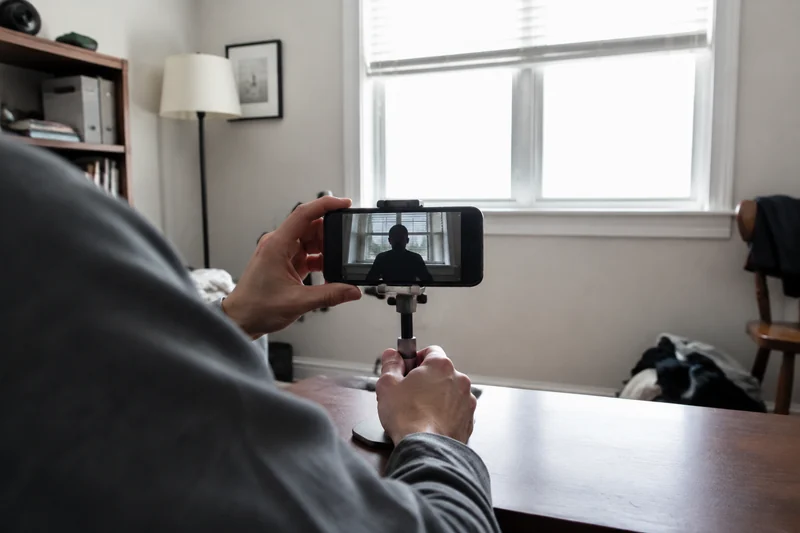
Fix the setup before the shopping list
Start with the same phone, framing, clothes, and subject position for every test. Put the brightest existing light in front of you instead of behind you, then replay the same shot before buying a ring light. Change one lighting variable at a time. A ceiling fixture may brighten the room while leaving eye sockets and the front of the face in shadow. The useful light may also be too far away, mixed with a different color of lamp, or blocked by the phone and furniture.
Keep the phone, framing, clothes, and subject position fixed while you change one lighting variable at a time. A ten-second playback is more useful than judging the room with your eyes because the phone cannot capture the same range of bright and dark detail that you can see.
Use the failure pattern to choose the next test
| What the recording shows | Inspect first | Free or reversible test | Do not assume |
|---|---|---|---|
| Face becomes a silhouette | Bright window, monitor, or lamp behind the subject | Turn the setup so the strongest light is in front of the subject, then replay the same shot | More exposure will preserve both the face and a very bright background |
| Dark eyes and a bright forehead | Ceiling light directly above the subject | Turn it off temporarily and move a lamp or window light slightly above and in front | A brighter overhead bulb will soften the shadows |
| One side is very bright and the other disappears | Side window or small hard lamp | Turn slightly toward the source or bounce some light from a white card on the darker side | Adding another unmatched lamp is the first fix |
| Skin or walls change color during the clip | Daylight mixed with warm or cool room lamps | Test one color family at a time and close or shade competing sources | Auto white balance will always stay consistent |
| Grain or smeared motion appears in a dim room | Low light, subject motion, and phone recording settings | Add existing front light, reduce unnecessary motion, and compare a normal-speed clip | Resolution alone fixes low-light capture |
| The shot works once but not tomorrow | Window timing, furniture position, and auto exposure | Mark the phone and chair locations and repeat at the same time of day | A one-time good frame is a repeatable setup |
Move the bright background out of control
Adobe's explanation of dynamic range uses the same basic failure: when a person stands in front of a bright window, a camera may preserve the window or the face, but not both. The first experiment is therefore geometric, not a purchase. Move the phone and subject so the window is in front of the subject or just off to one side, and keep the bright glass out of the background when possible.
Vimeo's at-home lighting guide also recommends starting with natural light and placing it in front rather than behind the subject. A sheer white curtain can soften harsh daylight. A white card or another neutral matte surface can return a little light to the darker side without adding a second powered source.
Do not stare into intense direct sunlight or improvise a diffuser against a hot lamp. Curtains, bulbs, fixtures, and powered lights still need to be used within their instructions and clearances.
Make the closest useful source do more work
Light intensity at the subject changes quickly with distance. Before buying a larger fixture, move an existing safe, diffused source closer and lower its brightness if needed. Keep it slightly above eye level rather than below the face, and place it near the camera axis or somewhat to one side.
Watch the playback for four things:
- Can both eyes be seen without one side becoming flat and glaring?
- Are forehead, glasses, or glossy products reflecting a bright white patch?
- Does the background remain visible without becoming the brightest object?
- Does the result survive a small head turn or hand movement?
If moving the source closer creates a hard hotspot, increase diffusion only with a material and fixture that are safe for that light, or bounce the source from a broad matte white surface. Do not cover a lamp or ventilation opening with an improvised material.
Test one color family at a time
Daylight from a window can look cooler than a household lamp. When both sources compete, the phone may adjust color during the clip. Start by turning off the least useful source. Compare window-only, lamp-only, and then the most controlled combination.
On supported iPhones, Apple documents controls for Auto FPS, HDR video, camera locking, and white-balance locking under Record Video settings. Apple also says Auto FPS can reduce the frame rate to 24 fps in low light. Those controls are model-dependent and do not replace better lighting; they explain why two clips may handle a dim room differently. Android options vary by manufacturer and camera app, so use the instructions for the exact phone.
Run a five-clip no-buy test
Record the same ten-second line five times. Do not change the phone position or framing between clips.
- Current room exactly as it is.
- Bright background removed from behind the subject.
- Strongest existing light moved in front and closer.
- Conflicting overhead or mixed-color lamp turned off.
- White card added on the darker side if it improves the previous clip.
Review the clips at normal brightness on the phone you actually use to edit or post. Choose the simplest repeatable arrangement, not the brightest frame. Record the time of day, window position, source distance, and which room lights were on.
Define the lighting job only if the test still fails
A purchase becomes reasonable when the remaining problem is specific:
- Fast front-camera fill: the phone is close and the setup needs to fit in a pocket, accepting limited coverage and camera-clearance constraints.
- Movable one-light control: a small panel must sit beside the phone, change brightness or color, and move between rooms.
- Repeatable dedicated setup: a larger light and stand can stay assembled, with enough floor space, cable clearance, and storage.
Those are different jobs. A tiny clip-on cannot behave like a full-size key light, while a large ring kit may solve a lighting problem by creating a new floor-space and setup problem.
Bottom line
Remove the bright background, bring useful light in front, simplify the color mix, and replay the same framing before buying gear. If the shot still fails, use the small-room light-position guide to define the geometry, then compare exact formats in the phone-video lighting research shortlist.