
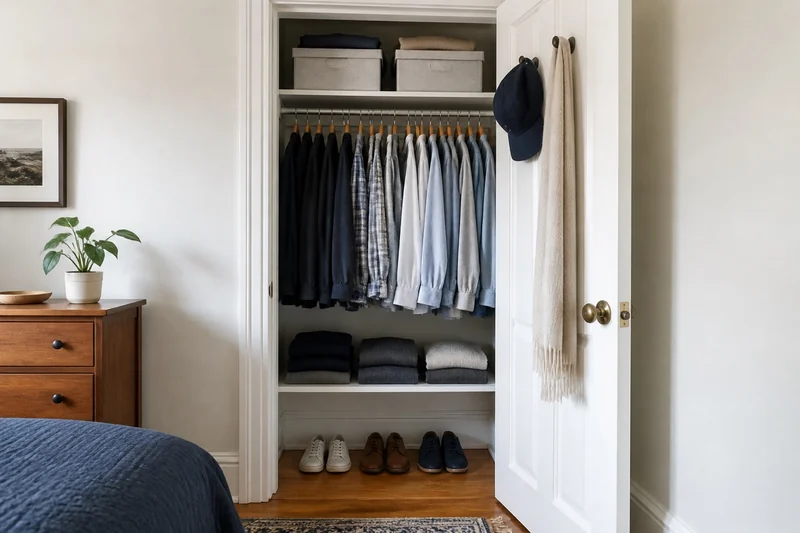
Start with access, not containers
A small closet is not improved merely because more objects fit inside. The useful test is whether the right item can be seen, removed, and returned without rebuilding the closet around it.
First, give the closet one main job. Is it a daily wardrobe, a coat closet, a linen closet, or mixed household storage? A professional organizer consulted by Apartment Therapy identified an unclear purpose as the central problem in one narrow closet: unrelated categories were competing for the same useful space.
If the closet must serve more than one job, define each category before buying bins. Move papers, keepsakes, luggage, and occasional equipment elsewhere when another existing storage location makes more sense. Do not optimize prime reach for items that rarely leave the closet.
Map six zones by how often you reach
Stand in front of the open closet and notice what you can reach without a stool, deep bend, or sideways shuffle. That route matters more than a perfectly symmetrical photo.
Prime reach
Use the easiest eye-to-waist-height shelf area and the most accessible section of the rod for items worn or used most days. Nothing in this zone should require moving another item first.
Secondary reach
Use the rod ends and the areas just above or below prime reach for weekly items. These may require a small reach or bend, but they should remain visible.
Overhead
Reserve the top shelf for lightweight seasonal or occasional items. Keep each category contained enough that removing one item does not pull down the rest. Heavy objects do not belong where they are difficult to control safely.
Floor
Give shoes, a hamper, or one low container a deliberate footprint. Preserve the door path and the clearance below hanging clothes instead of filling every inch.
Door and side walls
Hooks or shallow storage can hold light accessories when the door still opens fully and nothing strikes clothing or trim. The back of the door is useful space, but it is not free space if added depth blocks the closet.
Deep corners
Use hard-to-reach corners only for labeled, low-frequency items. A daily item that disappears into a corner has been assigned to the wrong zone.
In a separate professional-organizer project, Apartment Therapy reported the same access principle: high-use categories at eye level and seasonal or rarely used items on upper shelves. The exact heights still depend on your body, mobility, door type, and closet geometry.
Decide what hangs and what folds
Do not start by trying to fit every garment on the rod. The better question is which storage method protects the garment and supports the way you get dressed.
Martha Stewart's expert guidance frames hang versus fold as a decision shaped by closet and dresser space, personal habits, garment type, and fabric. A practical starting point is:
- hang structured or wrinkle-prone garments when the rod provides enough vertical clearance;
- fold heavy or stretchy knits that may lose shape on a hanger;
- group long-hang and short-hang garments separately so unused space below shorter clothing becomes visible;
- keep off-season clothing out of the prime daily zone.
These are storage choices, not promises that a garment will remain wrinkle-free or undamaged. Follow its care label when material or construction creates a specific requirement.
Measure the route before the organizer
An organizer can fit the back wall and still fail at the opening. Record:
- the narrowest clear width through the open door;
- usable interior depth after accounting for doors and trim;
- shelf widths, depths, and vertical gaps;
- rod height and the drop of the longest hanging garment;
- floor clearance below short-hang clothing;
- obstructions such as hinges, baseboards, outlets, vents, and sliding doors;
- the height you can safely reach and return an item with one hand.
The Home Depot's current small-closet guide also separates hanging needs by garment length and recommends using vertical, door, and wall space. Apply that layout idea to your own garment lengths and available space.
Run the seven-day no-buy test
Use removable tape, existing boxes, or empty shelf space to mark three simple levels: daily, weekly, and seasonal. Then use the closet normally for seven days.
Record only failures that affect the decision:
- an item migrates toward the door or floor;
- one category hides another;
- returning an item requires two hands or moving something else;
- clothing drags on a shelf, bin, or shoe zone;
- the door catches on hooks or added depth;
- a container is too high, deep, heavy, or opaque to use easily;
- an apparently empty gap is actually needed for movement.
Change one failed zone at a time. Use a seven-day check to spot awkward access, then adjust as your wardrobe and routine change.
Buy only for the failure you observed
A second hanging rod may help when short garments dominate and usable clearance exists below them. A shelf divider may help when one folded stack repeatedly collapses into another. A shallow door organizer may help when light accessories have no visible home. A labeled bin may help when seasonal items must remain in the closet.
None of those products is automatically useful. Each adds thickness, weight, installation requirements, or another reset step. If the no-buy layout works, the correct purchase may be nothing.
What you still need to check
- Your height, mobility, door movement, wardrobe, and dressing routine determine which area is truly easiest to reach.
- Anchoring, load capacity, fit, stability, garment clearance, and durability depend on the exact organizer and closet construction.
- A mockup cannot reproduce shelf thickness, hardware, flex, or long-term use.
- The workflow does not identify one universal closet organizer.
Bottom line
Give the easiest reach to the items used most, protect the garments that need hanging or folding, and test the return path for a week. Buy storage only when the failed zone tells you exactly what the product must fix.
When the closet's seasonal items move below the bed, use the clearance-first under-bed storage comparison to separate low-profile bags, wheeled boxes, and frequent-access drawers.
If the closet also holds dirty laundry, map the entire trip to the washer with the laundry-hamper route guide before giving floor space to a rolling or carry-first format.
For a smaller horizontal storage problem, the kitchen-drawer organization guide uses the same no-buy principle with purpose, placement, fit, and reset checks.