
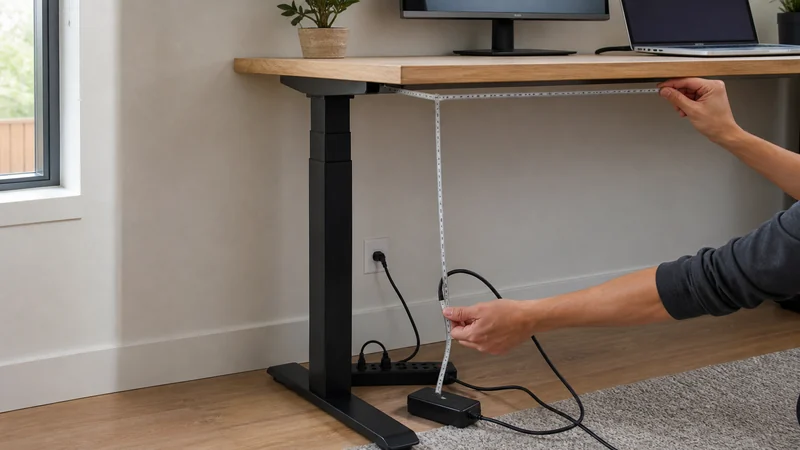
Most cable-management failures start before the tray goes up. The strip is larger than expected, one adapter blocks two outlets, the monitor clamp occupies the mounting lane, or the standing desk reaches its highest position and pulls a cable tight. A route map exposes those conflicts while they are still cheap to change.
Start with the equipment, not the accessories
Turn off and unplug equipment according to its instructions before handling the power setup. Put every cable, plug, charger, adapter, hub, and power strip that belongs at the desk in one visible place. Add anything that regularly connects for work, filming, audio, charging, or backups.
Label both ends of cables that are difficult to identify. Then divide the system into three groups:
- Fixed power: monitor, computer, dock, speakers, lamp, and other leads that rarely move.
- Fixed signal: display, network, audio, and peripheral cables that stay connected but should remain serviceable.
- Frequent access: phone, camera, microphone, headphones, removable drives, and laptop charging leads handled during a normal week.
The goal is not to hide all three groups together. Fixed bulk can live in a tray or box. Frequently handled leads need an accessible landing point.
Use as you go
Your working checklist
0 complete
The ten-minute cable-route audit
Draw the route as one continuous line
Start at the wall outlet. Draw the route to the power strip, then to each device. Mark where cables cross a moving desk frame, turn around an edge, pass a heat-producing adapter, or enter a tray. Add a service loop where a device must move for cleaning or adjustment.
If the desk changes height, draw two versions: seated and standing. The route must remain controlled in both positions. A cable can appear tidy at one height while becoming tight, dragging on the floor, or entering a moving joint at the other.
WorkWhileWalking treats standing-desk cable management as a system of trays, sleeves, chains, tracks, and related parts because the moving path adds a separate constraint. Check the whole moving route, then choose the combination of supports it needs.
Choose an anchor location
The anchor holds the power strip and bulky adapters. An under-desk tray can move with an adjustable desktop, reducing the number of long device leads that must travel to the floor. A floor cable box can work when the desktop is glass, metal, crowded, rented, or otherwise unsuitable for mounting.
Do not assume a clamp avoids every installation problem. A clamp still needs a compatible desk thickness, exposed edge, and clearance from the frame and monitor hardware. Do not assume screws fit every desktop. Material, thickness, fastener length, embedded hardware, and manufacturer instructions control whether drilling is appropriate.
If a monitor arm is part of the plan, test its full movement before fixing the cable route. The cable must reach the nearest, farthest, highest, and lowest supported positions without pulling on a connector or entering a joint. Use the monitor arm versus stand fit guide to verify the display, mount, desk, and cable interfaces together.
Dry-fit before making the route permanent
Use removable painter's tape to mark the tray or box footprint. Hold a cardboard stand-in in the proposed position. Place the loaded paper outline inside it and confirm that the plugs, brick bodies, cable bends, and access direction still fit.
Rehearse one real maintenance task: unplug a monitor, swap a charging cable, or remove the power strip without dismantling the entire route. If the task is frustrating before installation, additional ties will probably make it worse.
BTOD similarly recommends starting with a tray for the main load and then adding targeted components. Its exact Monoprice observations also show why a power strip should be measured before choosing a narrow tray. This supports the sequence, not a claim that one publisher's setup will fit another desk.
Add access points last
Once the fixed route works, decide where frequently used cables should wait. A small open or magnetic clip near the desk edge can keep a phone or camera cable reachable. A reusable tie can control excess length without turning the route into a sealed bundle. A sleeve can make the single vertical run look like one line.
Do not buy a large all-in-one kit merely to collect parts. Count the exact number and size of access points first. Cable diameter, connector width, direction of pull, surface material, and expected repositioning determine whether a clip or adhesive channel is useful.
Keep electrical limits visible
Cable organization is not electrical redesign. Follow the outlet, power-strip, charger, and device instructions. Do not connect power strips or extension cords in a daisy chain. Do not force damaged cords into service, sharply kink them to close a box, cover required ventilation, or charge a lithium-ion battery inside a closed cable box.
Consumer Reports emphasizes adequate size, openings, access, and airflow for cable boxes and cites Electrical Safety Foundation International guidance against charging lithium-ion batteries inside one. If a strip, plug, brick, or box becomes warm, damaged, overloaded, or inconsistent with its instructions, stop and correct the electrical setup rather than hiding it.
What this route audit cannot prove
- Safe mounting on an unknown desk material or concealed hardware
- Long-term adhesive strength, screw retention, clamp stability, rattle, or finish wear
- Thermal behavior for a particular power strip, charger, or equipment load
- Cable-chain durability, standing-desk collision behavior, or cord life
- The fit, capacity, availability, or value of a product that has not been installed and tested
Keep the dock’s daily connection accessible
Place a dock’s host cable where you can unplug the laptop without pulling the dock or either monitor lead. Reserve separate space for a supplied power brick or the hub’s external charger, and check the cable route at every desk height. The hub-versus-dock guide helps decide which equipment will stay under the desk and which needs to travel.
Leave the daily controls reachable
For a shared work and personal desk, use the two-computer KVM connection map before bundling the leads. Keep the switching control and any cable you regularly move within easy reach.
Adding backup power is a separate equipment decision. The home-office UPS and power-station comparison helps you choose the essential load and required backup time before making the cable route permanent. Follow the backup unit’s own placement and connection instructions.
Before you buy
Finish with a one-line bill of materials: one anchor, one vertical route, the number of access points, and any reusable ties. If the current cables can be routed safely with items already owned, the correct shopping list may be empty.
The current desk cable-management research panel shows how a clamp-on tray, screw-mounted tray, and floor box map to different desk constraints. For creator equipment, pair the route with the solo phone stabilization guide so the cable layout reflects the gear that actually stays on the desk.
The finished route should be easy to use, easy to inspect, and easy to change. That is a better result than hiding every cable once and rebuilding the whole desk the next time one device moves.
Cable management for a standing desk
Mount the tray and suitable power strip so they travel with the desktop, within the products' mounting and load instructions. Leave a service loop for cables crossing from the moving surface to fixed equipment. Check the full seated-to-standing travel before tightening the final ties; a neat cable bundle should not pull on a connector at the top of the lift. Keep heavy adapters supported by the tray rather than hanging from their plugs.